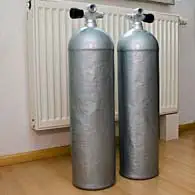
 Of course, you can't really dive with compressed air bottles made of wood and cardboard! But then what good are they supposed to be? - To answer this question, we have to delve deeper into the fascinating world of scuba divers:
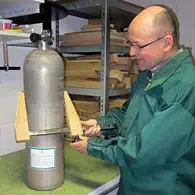 I met Robert
  Lange-Tauchen via Facebook. He would like to equip a mannequin with diving equipment for advertising purposes. Real compressed air bottles are too good and too heavy for this purpose. That's why two dummy diving bottles are needed! So: take your measurements and get started!
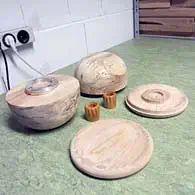 Choosing wood for the bottle heads is not easy for me: most of the wood I have in the right size is simply too good for this purpose! Finally, I select a section of a half-trunk of birch tree. I immediately turn the two workpieces roughly so that they can dry out a little if necessary. I made my choice well: the wood does have some flaws. It would hardly ever have resulted in extraordinary bowls. I find suitable blanks made of ash for the bottle bases. I have the most fun making the small valve knobs: it's not for nothing that I've chosen the word "Miniature" as my name!
 During all the work I've done so far, I've been racking my brain as to where I could find suitable tubes/sleeves (180mm outer diameter) for the bottle bodies: The local carpet dealer would like to give me cardboard winding cores; unfortunately the diameter is much too small. The PVC pipe range in our hardware store ends at a nominal width of 160. I can find polyacrylic pipe with a suitable diameter on the internet. However, this is too expensive for me - plus the transport and cutting fee! I email a few randomly selected retailers/manufacturers of packaging material to ask for suitable cardboard tubes: after all, I receive immediate rejections from all of them!
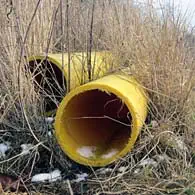
During a digestive walk I gain hope again: my wife suddenly discovers apparently abandoned plastic ears that have already grown deep into the grass! But unfortunately the diameter and wall thickness are too large!
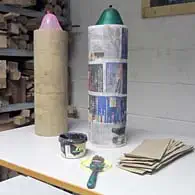 Complaining doesn't help! - So: do it yourself! I measure the required circumference on a leftover piece of sturdy textured wallpaper and glue the two ends together to form a tube. I then want to build up a sufficiently stable wall thickness layer by layer using waste paper and wallpaper paste. This is easier said than done, because the damp paper is quite "floppy" at the beginning. When the idea comes to me to stabilize the whole thing with a few balloons, things become child's play. I always alternate between a layer of packing paper and a layer of newspaper; This way I keep an overview and get a uniform wall thickness.
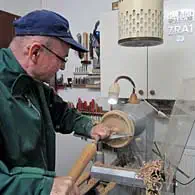 Now that the cardboard tubes have dried thoroughly and the exact inside diameter has been determined, the wooden bottle bases and heads can be turned and fitted precisely.
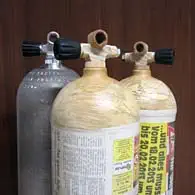 During the drying time for the cardboard tubes, the two bottle valves were also completed. Everything fits together perfectly and can be glued!
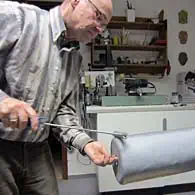 After priming twice with a remainder of "low-odor" gray pre-paint, the final treatment is with hammer paint. So that the effect paint can develop its full effect, I put the brush aside and use a small brush roller.
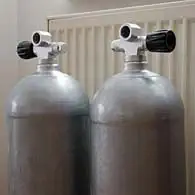 The paint is still wet. I very carefully pose the finished bottles for a photo: I want to share my joy about the successful work with others as quickly as possible!
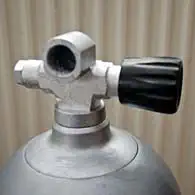 There is also a certain risk of confusion (!) with the originals when it comes to the valves, which have been painted with aluminum bronze and black ink.
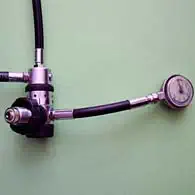 "I've finished!" - Well, how you take it: Robert visited me in the meantime and showed me what else you need for diving. So: clean up the workshop briefly and carry on!
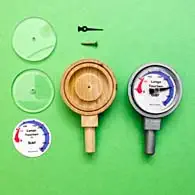 I particularly enjoy making the two pressure gauges (called finemeters by divers - you never stop learning!): I first design the scale on the computer. I then look for a leftover piece of acrylic glass for the cover glass, but can't find anything of the right thickness. At first I'm reluctant to simply place two slices on top of each other. But then I came up with the idea of arranging the pointer between the two disks. As with the original, this creates a distance from the scale, which can be clearly seen in the shadow cast on the scale. I am thrilled with the (intermediate) result!
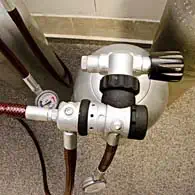 The pressure reducer is screwed directly to the compressed air bottle using a 5/8" thread. Unfortunately, I don't have a gear with 127 teeth, so I can only produce metric threads with my thread milling device ( Gewindefräseinrichtung ). To find out which metric pitch is closest to the original thread, I have to find my "metal table book" that I still have when I was an apprentice! - Or I'll keep up with the times and see if there's an app for the cellphone. And I'll find it:
  "Mechtab" .
G5/8" has a pitch of 1.814. So I choose 1.75 and am surprised: a set screw I milled as a test can even be screwed into the original bottle without any problems!
The pressure reducer consists of numerous individual parts that can be twisted together. I cut a piece of an M8 threaded rod to length. The individually turned parts are threaded onto this after they have been colored. A few hex nuts and some Allen screws complete this assembly.
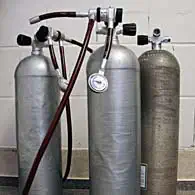 For the “wiring” of the individual components, I chose an inexpensive garden hose from the hardware store. I implemented the (missing) pressure hose screw connections using wooden tenons with the external shape of hose olives. Each regulator has three connections: (scuba regulator, wetsuit, pressure gauge).
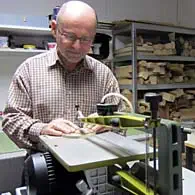 I saved building the regulators for last. It takes a bit of imagination to break down the rather complex shape into easy-to-turn parts! My fretsaw machine - which is unfortunately rarely used - also comes into play! For the complicated shaped mouthpiece made of silicone rubber, I suggest to Robert that he use the original part and only make a wooden attachment onto which the mouthpiece can be pushed and - like the original - secured with a cable tie.
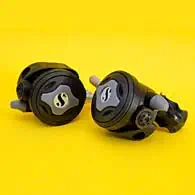 After the coloring comes the small simplifications, which I opt for in accordance with the golden rule of technology: "As precise as possible, but not more precise than necessary!" I decided, hardly noticeable! - I'm curious to see how the "total work of art" mannequin comes with
 Sidemount- (Monkey) equipment will have an effect on potential scuba divers!

