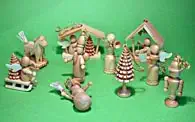
 You have looked at the previous pages with interest and now know how I became aware of left-hand turning, have seen how I set up a workstation for left-hand turning with great enthusiasm and are asking: When will it finally start? Then you can now look over my shoulder as I make a ten-piece set with hanging Advent figurines and enjoy the fascination that this extraordinarily attractive technique has. However, if you have already followed my example and created a way for yourself to do left-hand turning, even if it is just a temporary solution for a preliminary attempt, I recommend that you download and print out a complete working drawing in my download area.
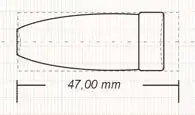
Bild 1
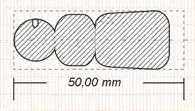
Bild 2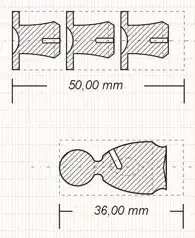
Bild 3
Bild 4

Bild 5 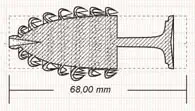 Bild 6
Production of the individual parts for the figurines
Using the working drawing, I created a parts list and cut a generous amount of wooden blocks to all the required dimensions. For the same parts, the cuts should be the same size, so you can rely better on your eye. For starters and generally for chip trees, I recommend lime wood. Later you can assemble the individual parts of the figures from different types of wood and even achieve a certain color. Santa's coat seems to me to be the easiest to shape. Let's attach a suitable rectangular piece of long wood to the Eureka chuck and first turn it cylindrically with the roughing gouge and then use the tip of the chisel to flatten the "flying" end face. We also use the tip of the chisel to drill deeply into the center in order to create a starting point for the small molded tube with which we will create the small recess into which we will later glue the head. The shoulder area can be shaped with the wide roughing gouge. We then smooth it out with the narrow chisel, which we also use to work on the hem of the coat at the other end. Parting is done with a parting steel. It doesn't get quite as clean as with a chisel, but it saves wood and who dares to look under Santa Claus' coat? For the snowman, we rough out a light cone instead of a cylinder. Then we can use the narrow chisel to practice turning spherical shapes, which we will often need. By the way: If you have often made workpieces based on drawings on a "normal" lathe, my drawings will seem somewhat unusual to you. As is well known, workpieces are drawn in the production position and our lathe spindle is ultimately located on the right side of the bench bed. Have I done something wrong with the cylinders? How should you drill the hole for the hanging thread? Well, in this case I drill it afterwards with a drill. This way I can turn the pan-shaped depression under the brim to fit the snowman's head. This means I don't have to sand any sloping surfaces on the head and I can vary the angle as desired when gluing them together. In addition, some parts require holes that are not in the axis of rotation and therefore have to be drilled with a drill anyway. The Nutcracker also needs a hole in his hat to glue the pendant into. There shouldn't be any problems here - or should there be? Unfortunately, for a normal twist drill, a left-hand lathe runs exactly the wrong way around. Whether a collector motor can be operated in both directions of rotation depends on its mechanical design. A rotation direction switch cannot be implemented for every motor (unfortunately not for mine either). First I ground off the shaft of a twist drill and ground a cutting edge at this end, which then works in the required direction. In order to be able to hold this drill, I soldered it with the original tip into a suitable metal tube. After this painstakingly crafted drill bit disappeared in the shavings after a short time, I remembered that as a child I had a drill bit that was part of my fret saw set and that worked in both directions. So I forged and filed a drill bit like this out of a nail. But I have since found out that it is completely sufficient to carefully poke the holes into the soft end grain with a small shoemaker's awl while the machine is running. By the way, I also use this awl to eject the leftover wood from my little Eureka chucks. My angels also used to have a hole in their heads for the thread. Later I realized that I could also attach the thread in the same hole as the wings.
Turning other individual parts
The following parts are a little smaller than the previous ones. But that's exactly what the left-hand turning process does: producing small mass-produced parts more efficiently and conveniently than on a conventional lathe is, after all, the purpose of this peculiarity of woodturning. For the thinner parts, I recommend making suitable bung chucks, as you would have to attach unnecessarily thick blanks to the Eureka chuck in order to get hold. The hatched part in the middle of the drawing is the broom for the snowman. As an alternative, you can also tie a beautiful broom out of thin cotton threads and half a toothpick, or cut a snow shovel out of parchment. On my site there are a few pictures with further suggestions, such as the angel with the accordion, which was folded out of parchment as a "witch's staircase", or the suggestion to decorate the figures with tin hoops. I am convinced that you will not be able to resist the fascination of left-hand turning and will soon realize your own ideas. I wish you good luck with this!
The chipping tree - left-hand turner's "journeyman's piece"
Benchnotes:
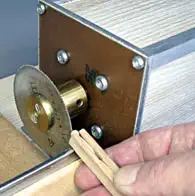
Some parts, such as Santa Claus' beard and the angels' arms, still need to be cut in half after turning. At first I tried to split them carefully with a thin pen knife, but found that this didn't always work satisfactorily. So I saw these parts with a tiny (unset) circular saw blade, which I attached to the left-hand lathe. I hold the small parts with a kind of wooden tweezers. I use the normal tool rest (with appropriate caution!) to support it, so I don't need a saw table here. A much safer method here would be to use a fretsaw machine.
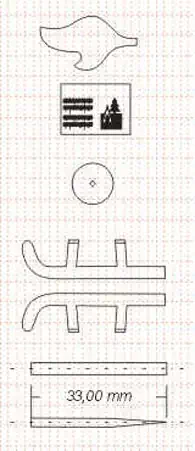
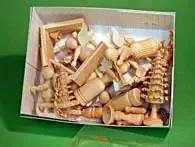
Before we can start gluing the numerous left-handed individual parts together, there is still a lot to do. Some of the parts have to have additional holes into which, for example, the angel wings or the trumpet can be glued. Some parts also need to be lightly carved. (The large angels, for example, have a flattened back and flat surfaces for gluing the arms, etc.) Parts are also required that cannot be made on the lathe. Some can be seen on the drawing opposite, others, such as the parts for the house and the church, can be found on the drawing in the download area. If I have forgotten something, you will certainly be able to add it with a little imagination. In general, I would like to expressly encourage you to pursue your own paths and to modify and expand my suggestions and suggestions according to your ideas and possibilities. In the Tips and Tricks section of my site you will find further useful information, for example about processing parchment.
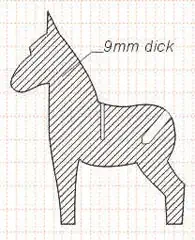
The horse has little to do with left-hand turning, which I hope to inspire some of my readers with this article. I still think it's a nice round-off for our Advent set, as it also proves our versatility as skilled woodworkers! If you ignore the special technique of tire turning, a horse, which was a popular children's toy in the past, was not that easy to produce efficiently, even for the toymakers of bygone times. Apparently it was precisely because of this problem that the successful development of a toy industry failed in some areas! For us amateurs, the time factor probably doesn't play a very important role, so we saw out a few horses with the fretsaw and lovingly carve them and then finish them off with a beautiful cotton tail.
Download blueprint "Adventfigürchen"
Download Notenblätter für Miniaturengel "Sänger"

 Bild 7
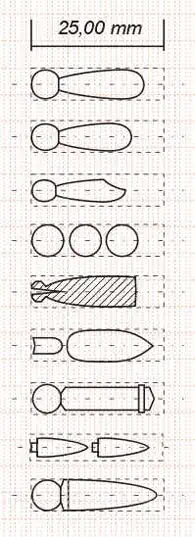 Bild 8