 Anyone who - like me - grew up as a well-protected only child wants to be well-protected when they get older. And: Anyone who - like me - was allowed to practice on their father's lathe as a child should at some point be able to turn a suitable hat for their head, which has long since become bald!
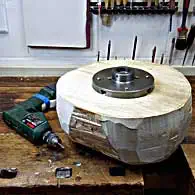 The first hurdles have been overcome: I was allowed to choose a few knot-free trunk sections from a freshly felled birch tree, which were cut in half across the core with a chainsaw on site! I then do the further rough preparation of a blank that my lathe can safely hold at home using a foxtail and an electric plane. I attach the blank to a 150mm cast iron face plate using eight strong wood screws. Since fresh wood reacts to longer work interruptions by warping or even tearing, I make sure before starting work that all the tools required for the individual work steps are ready and fully functional.
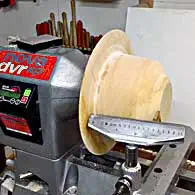 With a speed of 750rpm, I carefully begin to turn off the parts that protrude the most until a rotationally symmetrical body is finally created. Then I increase the speed to 900rpm. In advance, I twisted the ash wood handle of my 1/2" bowl turning tube so that I can drive it into a suitable piece of steel tube for extension. I filled the cavity at the rear end of the tube with lead. I hope that the higher weight will make it safer and easier tool guidance with less vibration. The outer shape is quickly roughly pre-turned and I first have to put things back in order in the small work area: the damp chips pose a significant risk of slipping!
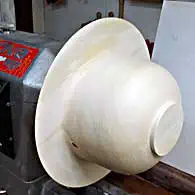 For the outside diameter, which is the result of the determined inside diameter plus twice the wall thickness, I cut out a radius gauge out of strong cardboard. Another radius gauge helps when finishing turning the attachment for the chuck, which is supposed to hold the hat during hollowing out. In the photo opposite, the top is finished turning and already sanded.
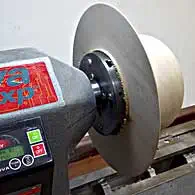 I also turned the underside of the hat brim flat in good time. This makes it possible to detect any defects in this area and, if necessary, turn them away, as long as the brim is still thick enough.
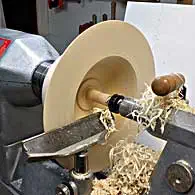 An attractive feature of my lathe is undoubtedly the swiveling headstock. It enables a more back-friendly way of working - especially when hollow turning - as you don't have to hang your upper body over the bench bed when the headstock is swung out. Nevertheless, in this case I decided to leave the headstock in its original position. So I can use the tailstock to
1) to center the workpiece more easily after re-chucking and
2) At the beginning of hollow turning, when it is still quite heavy, the workpiece should also be secured with the rotating center point.
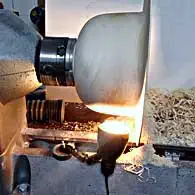 The "melon shape" that I chose for my hat because the dimensions of the blank would otherwise only have allowed for a very flat truncated cone or even cylindrical shape, now makes hollow turning a bit of a hassle: Given the thin wall thickness, the risk is quite high to turn deeply without moving in far enough! In order not to have to stop and measure here too often, I positioned an LED lamp with a magnetic base on the bench bed.
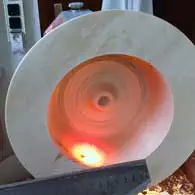 The light shining through the wet wood offers a certain orientation and security. But be careful: end grain is much more transparent than cross wood and dry wood is less transparent than wet wood. Conclusion: Without checking with suitable buttons that go around the brim of the hat, you can't even use a lamp.
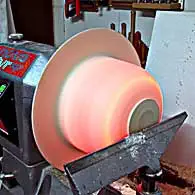 Once the hat has been hollowed out to the desired wall thickness and the inside has been cleanly sanded and clamped, the next step becomes obvious: the screwed-on clamping pin still needs to be removed! This works best with a light food. I described how to make this tool in the article "Lichtfutter" in the “Clamping Methods” category!
 No, the speed was not chosen so high that the workpiece glows! The uniform illumination using a light lining shows that the clamping pin has been completely turned away and the hat has a largely uniform wall thickness.
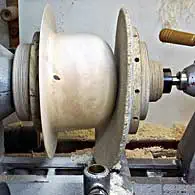 Exciting question: Will the hat be easily removed from the light lining? Although I only switched on the 50W halogen lamp of the light lining for short checks, I fear that the heat radiation has further shrunk the hat and it could sit exceptionally tightly on the conical light lining! As a precaution, I attach a wooden faceplate to the tailstock, which I "pad" with a leftover piece of carpet so that I have both hands free to remove the hat.
 Voila! The hat came off the lining without any damage! Relieved, I put it over my head and take the time for a “selfy”.
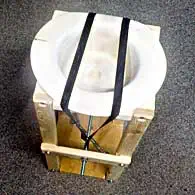 Now the hat has to dry further in a so-called “bender”. By carefully tightening the M10 threaded rod, the hat is adjusted to the oval head shape of the potential wearer. The tension of the elastic bands determines the lateral curvature of the brim.
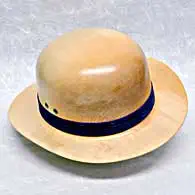 After fine sanding by hand, the surface treatment can be carried out. I chose a velvet ribbon as the hat band. Four ventilation holes with inserted hollow rivets are also part of the finish!

